Wednesday, January 22, 2025

How to make a free pallet shed with simple materials

Building Your Own Free Pallet Shed: A DIY Adventure

So, you're dreaming of a shed, but your wallet's feeling a little…light? Don't despair! With a little elbow grease and some scavenged materials, you can build a fantastic pallet shed practically for free. This isn't about creating a showstopper, but a perfectly functional storage solution. Let's get started on this fun, frugal project!

Step 1: The Pallet Hunt

Before we even think about hammering a nail, we need the star of the show: pallets! Now, this is where the "free" part really comes in. Your best bet is to scour your local area. Think:

  • Behind businesses: Many stores and warehouses regularly discard pallets. Ask politely if they have any they're willing to part with. Sometimes, a quick offer of helping them clean up the area sweetens the deal.
  • Construction sites: Construction sites are goldmines for discarded materials, including pallets. Be respectful and ask for permission before taking anything.
  • Craigslist/Facebook Marketplace/Freecycle: People often post free pallets online. It's worth checking regularly!
  • Farmers' markets and produce suppliers: These businesses often use pallets and might be happy to give you some.

Remember to inspect the pallets carefully. Look for any signs of rot, pest infestation, or significant damage. You want sturdy pallets that can withstand the elements and support the weight you'll be storing.

Pallet Preparation: The Necessary Evil

Once you've collected your pallets, it's time for some prep work. This is crucial for a safe and long-lasting shed.

  • Clean them thoroughly: Use a stiff brush, water, and maybe some soap to remove dirt, debris, and any lingering remnants of what was shipped on them.
  • Check for nails: Some nails might be loose or sticking out, posing a safety hazard. Remove any loose nails and hammer down any that are protruding.
  • Inspect for pests: Make sure there are no signs of insects or rodents before bringing them home. Treat any infestations before proceeding.
  • Disassemble (optional): You might need to take some pallets apart to use the wood more efficiently for your shed's design. If you're not comfortable disassembling, you could just build with the pallets intact.

Step 2: Designing Your Pallet Shed

Now for the fun part â€" designing your shed! The possibilities are endless, depending on the number and size of your pallets. Consider:

  • Size and shape: How much storage space do you need? Will it be a simple square, or a more complex design?
  • Height: How tall do you want your shed to be? Keep in mind your pallet height will determine the overall height, so plan accordingly.
  • Door placement: Where will the door be located? This affects the overall structural design.
  • Roof design: A simple single-slope roof is easiest to construct. A more complex design requires additional skill and materials.

Sketch out your design on paper. This will help you visualize the final product and ensure you have enough pallets.

Step 3: Construction â€" The Pallet Puzzle

This is where things get hands-on! Remember, this is a basic shed, so don't expect architectural perfection. The key is functionality and sturdiness.

  • Base: Create a solid base using more pallets, or even concrete blocks if you have them. This will prevent the shed from sinking into the ground.
  • Walls: Interlock the pallets to create the walls of your shed. Use screws, nails, or even strong wire to secure them together. Remember to leave space for the door.
  • Roof: The roof is the most challenging part. For a simple single-slope roof, lay pallets across the top of the walls, angling them to shed water. Secure them firmly using screws or nails.
  • Door: You can construct a door using more pallets or even repurpose an old door if you have one. Make sure it's securely attached and hinges work smoothly.

Step 4: Finishing Touches (Optional)

While your pallet shed is functional as is, you can add some finishing touches to improve its look and longevity:

  • Paint or stain: A coat of paint or stain will protect the wood from the elements and give your shed a more polished look.
  • Roofing material: For added weather protection, consider adding a layer of roofing felt or even tar paper to the roof.
  • Hardware: Add sturdy latches or a padlock to keep your belongings safe.

Commonly Asked Questions

Q: Are pallet sheds weatherproof?

A: Not completely, unless you take extra steps like adding roofing felt and sealing the gaps between pallets. They're better suited for dry climates or storing items that can tolerate some moisture.

Q: How long does it take to build a pallet shed?

A: This depends on the size and complexity of your design, as well as your experience level. Expect to spend several hours, possibly even a weekend, on the project.

Q: What tools do I need?

A: You'll need a hammer, nails or screws, a screwdriver (if using screws), a measuring tape, and possibly a saw (if you're disassembling or cutting pallets). Safety glasses and gloves are highly recommended.

Q: Can I use treated pallets?

A: Use caution with treated pallets, as some treatments contain chemicals that might be harmful. Make sure you know what type of treatment was used before handling or using them.

Q: What can I store in my pallet shed?

A: Garden tools, outdoor furniture, firewood, and other relatively lightweight and weather-resistant items are ideal. Avoid storing anything valuable or easily damaged by the elements.

Building a pallet shed is a rewarding project that combines creativity, resourcefulness, and a touch of DIY magic. Remember to prioritize safety, plan your design carefully, and enjoy the process! You'll be surprised at how much you can accomplish with some ingenuity and a few free pallets.

Continue reading

Simple free pallet shed designs for storage and shelter

Free Pallet Shed Designs: Build Your Own Storage Haven!

Hey there, fellow DIY enthusiasts! So you're looking to build a shed, huh? And you're on a budget? Fantastic! Because I'm all about resourceful projects, and using reclaimed pallets is the ultimate way to save money and be environmentally friendly. Let's dive into some simple, free pallet shed designs that will transform your outdoor space. We'll cover everything from planning to construction, so grab your coffee (or tea!), and let's get started!

Planning Your Pallet Shed Project

Before you even think about hammering a single nail, it's crucial to plan. This isn't about building a spaceship â€" it's about building a shed, which is way less complicated! But planning will make the whole process smoother and prevent those frustrating "Oh, shoot!" moments.

Assessing Your Needs and Space

First things first: what will you use your shed for? Storing gardening tools? Bicycles? Extra furniture? The size and design of your shed will depend entirely on what you need to store. Next, measure the space you have available. Make sure you leave enough room for access and maneuverability. You don't want to build a gorgeous shed that you can't actually use!

Gathering Your Materials (Mostly Free!)

The beauty of using pallets is that they are often free! Check with local businesses like construction sites, supermarkets, and even breweries. Many are happy to get rid of them, and you might just strike gold with some perfectly usable ones. However, don't just grab any old pallet. Inspect them carefully. Look for:
  • Structural integrity: Are the boards sturdy and securely attached? Avoid pallets with broken or rotting wood.
  • Pest infestation: Check for signs of termites or other pests.
  • Treatment: Some pallets are treated with chemicals, which might not be suitable for certain uses. Research this before you use the wood for anything that might come into contact with food or pets.
Once you've found your pallets, you'll also need some basic tools: a hammer, nails (or screws), a saw (possibly a circular saw for faster work), measuring tape, and a level. You might also want safety glasses and gloves.

Choosing a Design

There are tons of designs available online â€" from simple three-walled structures to more elaborate sheds with roofs and doors. For a beginner, a simple, three-walled design is a great starting point. You'll lean the back against an existing wall or fence. This significantly simplifies construction! More complex designs require more advanced carpentry skills. Remember to research your local building codes before you start.

Simple Pallet Shed Designs

Here are a couple of easy designs to get you started:

The Three-Walled Wonder

This design is perfect for beginners. It involves using pallets to build three walls and leaning the back of the structure against a solid wall or fence. You'll need to create a simple roof, perhaps using more pallets or even tarpaulin. You can easily add a door by leaving a space between two pallets or by constructing a simple wooden door frame and hanging a door.

The Lean-To Shelter

This is an even simpler design, ideal for a small, temporary storage solution. You only need to build one or two walls, leaning them against an existing structure like a garage or shed. You can then create a simple roof using pallets or tarpaulin.

Construction Tips and Tricks

Here are some tips to make your pallet shed building experience smoother:
  • Disassemble pallets carefully: Remove any rusty nails before using the wood.
  • Clean and sand the wood: This will remove any dirt, debris, and splinters, making your shed safer and more aesthetically pleasing.
  • Use screws instead of nails: Screws provide a stronger and more durable connection.
  • Treat the wood: Applying a wood sealant or preservative will protect your shed from the elements and extend its lifespan. This is particularly important if you are using untreated wood.
  • Reinforce the structure: Use extra supports to ensure your shed is sturdy and won’t collapse. Consider adding additional framing or bracing.
  • Add a roof: A roof is essential for protecting your stored items. You can use more pallets, corrugated metal sheets, or even heavy-duty tarpaulin.

Beyond the Basics: Adding Features to Your Pallet Shed

Once you have the basic structure up, you can personalize your shed! Add a simple door, shelves, or even a small window for ventilation. Get creative! Use leftover wood or other recycled materials to enhance its functionality and aesthetics. A lick of paint can also make a huge difference in transforming the look and feel of your pallet shed.

Safety First!

Remember to prioritize safety during the entire process. Wear appropriate safety gear like gloves and eye protection, and be mindful of potential hazards such as sharp nails and splinters. If you're using power tools, always follow the manufacturer's instructions and safety guidelines.

Frequently Asked Questions

Q: How long does it take to build a pallet shed?

A: This depends on the complexity of the design and your experience level. A simple three-walled shed could be built in a weekend, while a more elaborate design might take several days or even weeks.

Q: How much does it cost to build a pallet shed?

A: The beauty of this project is that it can be incredibly cheap! If you source free pallets, your main costs will be tools (if you don't already own them), screws, and any additional materials for the roof or door.

Q: Are pallet sheds weatherproof?

A: Not without proper treatment. Untreated pallets will eventually succumb to the elements. Applying a wood sealant or preservative and ensuring a good roof are crucial for weatherproofing.

Q: Can I use any type of pallet?

A: No. Avoid pallets that show signs of rot, pest infestation, or excessive damage. Check for heat treatment stamps to ensure the wood is safe for use.

Q: What if I don't have any carpentry skills?

A: Start with a simple design! There are plenty of tutorials available online to guide you. Don't be afraid to ask for help from friends or family who are more experienced.

So there you have it! Building a free pallet shed is a rewarding project that combines resourcefulness, creativity, and a whole lot of fun. Go forth and build your own outdoor storage haven! Remember to share your creations â€" I'd love to see what you come up with!
Continue reading

Free pallet shed blueprints for creating a sturdy outdoor shed

Free Pallet Shed Blueprints: Build Your Own Sturdy Outdoor Haven!

Hey there, fellow DIY enthusiasts! So you're dreaming of a charming, functional shed, but the price tags on pre-built ones are making your wallet weep? Don't worry, you're not alone! Tons of people are discovering the joy (and savings!) of building their own sheds using reclaimed pallets. And guess what? I'm here to help you do just that with some handy, conversational blueprints â€" completely free! Let's get started on building your very own pallet shed masterpiece!

Why Choose a Pallet Shed?

Before we dive into the specifics, let's talk about why using pallets is such a fantastic idea. First off, it's incredibly budget-friendly. Pallet wood is often free (or very cheap) if you know where to look â€" think construction sites, behind businesses, or even on Craigslist! Secondly, it's eco-friendly; you're giving old materials a new life, reducing waste and your environmental impact. And let's be honest, there’s something undeniably charming about a rustic, reclaimed-wood shed.

But, a word of caution: not all pallets are created equal. Some might be treated with chemicals that you don’t want near your garden or belongings. Always make sure to source pallets marked "HT" (heat-treated) â€" these are safe for repurposing. Avoid pallets marked "MB" (methyl bromide treated) as they contain harmful chemicals.

Gathering Your Materials and Tools

Alright, let's get down to brass tacks. Here's a general list of materials you'll need. Keep in mind that the exact quantities depend on the size of your shed. These are rough estimates for a small to medium shed (approximately 6ft x 8ft).

Materials:

  • Pallet Wood: Aim for 15-20 sturdy pallets. Inspect them carefully for damage and ensure they are HT-treated.
  • Pressure-treated lumber: For the foundation and any structural supports that need extra strength (at least 4x4 posts).
  • Roofing Material: Tarps, corrugated metal, or even recycled shingles can work, depending on your budget and aesthetic preference.
  • Screws: Lots of exterior-grade screws of varying lengths.
  • Nails: For additional reinforcement in certain areas.
  • Hinges: For the shed door.
  • Door Handle/Latch:
  • Concrete Mix (optional): For a more permanent foundation.
  • Paint or Stain (optional): To protect and enhance the look of your shed.

Tools:

  • Hammer
  • Screwdriver (preferably cordless)
  • Measuring Tape
  • Level
  • Circular Saw or Hand Saw
  • Drill
  • Shovel (if using a concrete foundation)
  • Safety Glasses and Gloves (Always crucial!)

Step-by-Step Blueprint (Simplified)

This isn't a precise, architectural blueprint, but rather a conversational guide to help you visualize the process. Adapt it to your desired size and design!

Step 1: Foundation

First things first: prepare the ground. You can create a simple gravel base, a concrete slab, or even use existing paving stones. The foundation should be level and sturdy enough to support the weight of your shed.

Step 2: Framing the Floor

Use pressure-treated lumber to create a frame for the floor, ensuring it's level and square. Then, begin to lay down your pallets, securing them to the frame with screws. You may need to cut and adjust some pallets to fit perfectly.

Step 3: Building the Walls

This is where the creativity comes in! You can build walls using pallets in several ways; vertically or horizontally. Make sure to secure the walls firmly to the floor frame and each other, and reinforce them with additional supports as needed. Leave space for your door.

Step 4: Installing the Roof

Create a simple roof structure (gable or shed roof style) using pressure-treated lumber. Once the framing is in place, attach your chosen roofing material. Make sure it's securely fastened and weatherproof.

Step 5: Door Installation

Hang your door using hinges and secure a latch. Make sure the door fits snugly and closes securely.

Step 6: Finishing Touches

This is your time to shine! Sand down any rough edges, apply paint or stain for protection and aesthetics, and add any extra features like shelves or hooks.

Tips and Tricks

  • Disassemble pallets carefully: Many nails will need to be removed.
  • Prioritize safety: Wear appropriate safety gear at all times.
  • Plan ahead: Sketch out your design beforehand to visualize the process.
  • Check building codes: Ensure your shed complies with local regulations.
  • Don't be afraid to adapt: This is your project, feel free to modify the blueprint to suit your needs and resources.

Commonly Asked Questions

Here are some of the most frequently asked questions about building a pallet shed:

  • Q: How long does it take to build a pallet shed? A: The construction time depends on your experience and the size of the shed. Expect it to take anywhere from a weekend to several weekends, depending on your schedule and the level of detail.
  • Q: How much does it cost to build a pallet shed? A: The beauty of a pallet shed is that it can be extremely inexpensive. Your main costs will be the pressure-treated lumber for the frame and roofing materials. If you source free pallets, your cost can be minimal!
  • Q: Are pallet sheds durable? A: With proper construction and maintenance, a pallet shed can be surprisingly durable. The quality of the pallets you choose and how well you assemble the structure will heavily influence its lifespan.
  • Q: Can I use treated pallets for a garden shed? A: Only use HT (heat-treated) pallets. Avoid MB (methyl bromide treated) pallets, as they contain pesticides harmful to plants and humans.
  • Q: What if I need more detailed plans? A: You can find more detailed blueprints online by searching for "pallet shed plans" or "DIY pallet shed blueprints". Remember to always check the source's credibility before starting your project.

So there you have it! Hopefully, this has inspired you to build your own amazing pallet shed. Remember to always prioritize safety and have fun with the process. Happy building!

Continue reading

Lean to shed designs for a simple and effective structure

Lean-To Shed Designs: A Comprehensive Guide to Simple and Effective Structures

Lean-to sheds, characterized by their single-sloped roof design, offer a practical and aesthetically pleasing solution for various storage and utility needs. Their simplicity in design translates to ease of construction, making them an ideal project for DIY enthusiasts with varying levels of experience. This guide explores various aspects of lean-to shed design, encompassing structural considerations, material selection, and practical applications.

Understanding Lean-To Shed Fundamentals

The fundamental principle of a lean-to shed lies in its reliance on an existing structure for support. This existing structure, be it a house wall, fence, or even another freestanding building, forms the higher end of the shed's roofline. The opposite end rests on a supporting wall or frame, creating a sloping roof that effectively sheds water and snow. This inherent simplicity makes lean-to sheds remarkably cost-effective and efficient in their design.

Advantages of Lean-To Sheds

The popularity of lean-to sheds stems from a multitude of benefits:

  • Cost-effectiveness: Requiring less material compared to a free-standing shed, lean-to structures significantly reduce construction costs.
  • Ease of construction: The relatively straightforward design simplifies the building process, making it suitable for DIY projects.
  • Space efficiency: They maximize available space by utilizing existing structures, minimizing land footprint.
  • Versatile applications: Lean-tos can serve diverse purposes, from storage to workshops, greenhouses, or even covered patios.
  • Aesthetic integration: When properly designed, lean-to sheds can seamlessly blend with existing structures, enhancing the overall aesthetic appeal.

Disadvantages of Lean-To Sheds

Despite their numerous advantages, lean-to sheds have some limitations:

  • Limited headroom: The single-sloped roof results in lower headroom towards the back of the structure, potentially limiting its usability.
  • Dependence on existing structure: The shed's stability relies heavily on the integrity of the supporting structure.
  • Snow accumulation: The sloping roof can accumulate significant snow, potentially requiring regular clearing.
  • Potential for water leakage: Improper construction or inadequate sealing can lead to water leakage, especially during heavy rainfall.

Design Considerations for Lean-To Sheds

Effective lean-to shed design necessitates careful consideration of several factors to ensure structural integrity, functionality, and longevity.

Size and Dimensions

The size and dimensions of the lean-to should be determined by its intended purpose and available space. Consider the required storage capacity or workspace dimensions when determining the length and width. The height of the supporting wall and the roof slope angle will dictate the overall height of the shed. Local building codes should be consulted to ensure compliance with regulations concerning height and setbacks.

Roof Pitch and Slope

The roof pitch, or slope, is a crucial design element impacting both the shed's appearance and its ability to shed water and snow effectively. A steeper slope facilitates better water runoff, preventing water pooling and potential leaks. However, a steeper slope necessitates more materials, increasing construction costs. A slope of at least 10-15 degrees is generally recommended for adequate drainage.

Foundation and Support

A solid foundation is essential for a stable and long-lasting lean-to shed. Several options exist, including concrete slabs, gravel bases, or even pressure-treated lumber footings. The chosen foundation type should be appropriate for the soil conditions and the shed's size and weight. The supporting structure should be robust enough to withstand the weight of the roof, walls, and any stored items.

Material Selection

The choice of materials significantly influences the shed's cost, durability, and aesthetic appeal. Common materials include:

  • Wood: A traditional and versatile choice, offering a natural aesthetic and relative ease of construction. Pressure-treated lumber is recommended for longevity and resistance to rot and insects.
  • Metal: Metal sheeting offers exceptional durability and weather resistance, often requiring minimal maintenance. However, metal can be more expensive and challenging to work with for DIYers.
  • Plastic: Plastic sheeting provides a lightweight and economical alternative, offering good weather resistance. However, it may be less durable than wood or metal.

Careful consideration should be given to the climate and the specific needs of the shed when selecting materials. For example, in areas with heavy snowfall, a robust roof structure is paramount, necessitating strong materials like pressure-treated lumber or metal.

Construction Techniques and Considerations

The construction process for a lean-to shed involves several key steps:

Foundation Preparation

This involves leveling the ground and preparing the chosen foundation. For concrete slabs, proper formwork and reinforcement are essential. Gravel bases require careful compaction to ensure stability. Wooden footings need to be treated with preservatives to prevent rot.

Framing and Wall Construction

The frame provides the structural support for the walls and roof. This typically involves constructing a rectangular frame using pressure-treated lumber, ensuring plumbness and squareness. Walls can then be clad using chosen materials, such as wood, metal, or plastic sheeting.

Roof Construction

The roof construction is crucial for proper water drainage and overall shed stability. Rafters are attached to the supporting wall and the opposing wall or frame, creating the sloped roof. Roof sheeting is then laid over the rafters, followed by appropriate waterproofing and sealing. Proper flashing around any joints is crucial to prevent water infiltration.

Finishing Touches

Once the structure is complete, finishing touches are essential. This may include adding doors, windows, and any necessary hardware. A coat of paint or stain can enhance the shed's appearance and protect the materials from the elements. Ensure proper ventilation to prevent moisture buildup inside the shed.

Legal and Safety Considerations

Before commencing construction, it's crucial to check local building codes and regulations. Permits may be required depending on the size and complexity of the shed. Safety precautions should be followed throughout the construction process, including wearing appropriate personal protective equipment (PPE) such as safety glasses and gloves. Ensure proper electrical wiring and plumbing installation if applicable. Always prioritize safety to prevent accidents during construction.

By carefully considering these design aspects, material choices, and construction techniques, you can build a simple, effective, and aesthetically pleasing lean-to shed that meets your specific needs and enhances your property.

Continue reading

Saturday, January 18, 2025

Essential tips for building a shed

Building Your Dream Shed: A Practical Guide for Beginners

So, you're thinking of building a shed? Awesome! Whether you envision a tidy storage space, a whimsical workshop, or a charming garden retreat, building your own shed is a hugely rewarding project. It's more achievable than you might think, and I’m here to walk you through it, sharing the tips and tricks I’ve learned along the way. Let's dive in!

Planning and Preparation: The Foundation of Success

Before you even think about grabbing a hammer, thorough planning is crucial. This isn’t just about sketching something on a napkin; we’re talking serious strategizing.

Choosing the Right Location:

Where will your shed reside? Consider access to utilities (if needed), sunlight, drainage, and proximity to your house. You’ll want it easily accessible but not obtrusive. Check your local building codes and HOA regulations before you even break ground â€" believe me, this is a headache you want to avoid later.

Designing Your Shed:

Size matters! Think about what you'll be storing or doing in your shed. A small 4x6ft shed might be perfect for tools, while a larger 10x12ft shed could house a workshop. Sketch out your design, noting door placement, window locations, and any internal shelving or workbenches. Don't forget about ventilation â€" you'll need it, especially if you plan on using power tools.

Gathering Your Materials:

Creating a detailed materials list is essential to avoid mid-project panic trips to the hardware store. I recommend using a spreadsheet or even a simple pen and paper list, breaking down everything from lumber and screws to paint and sealant. Factor in extra materials â€" it’s always better to have too much than too little. Don't forget about things like concrete for the foundation, if you're going that route (more on that later!).

Securing the Necessary Permits:

Building codes vary by location, and you’ll likely need a permit for your shed, especially if it’s larger than a certain size. Check with your local building department early in the process to avoid costly delays. Don't try to skip this step; it could lead to fines or even demolition down the road.

Building the Foundation: A Solid Start

A strong foundation is the backbone of any successful shed. There are several options, each with its pros and cons:

Concrete Slab:

This is the most durable and level option. It requires some effort and materials, but it provides a rock-solid base for your shed. Make sure your slab is properly graded for drainage to avoid water buildup.

Gravel Base:

A simpler, less expensive option, a gravel base is suitable for smaller sheds in well-drained areas. You'll need a significant amount of compacted gravel to ensure a level and stable surface.

Wooden Skids/Sleepers:

This is a good choice for sheds in areas with potentially unstable ground. Pressure-treated lumber is essential to prevent rot.

Framing and Construction: Getting Your Hands Dirty

With your foundation set, it’s time to build the frame of your shed. This is where precision is key.

Cutting and Assembling the Frame:

Use accurate measurements, and double-check everything before you commit to a cut. Square framing is crucial for a stable and structurally sound shed. A framing square is an indispensable tool here. If you're not comfortable with power tools, consider pre-cutting the lumber at a home improvement store.

Wall Construction:

Once the frame is assembled, you can start adding the wall sheathing. Plywood or OSB (Oriented Strand Board) are common choices. Ensure proper alignment and secure fastening with nails or screws.

Roofing:

Roofing can be a bit tricky, so take your time. Choose your roofing material carefully, considering your climate and budget. Asphalt shingles are a popular and relatively affordable option. Make sure the roof is properly sloped to ensure water runoff.

Installing Doors and Windows:

Carefully measure and cut openings for doors and windows before installing them. Use appropriate hardware and ensure proper sealing to prevent drafts and leaks. Consider using exterior-grade materials to withstand the elements.

Finishing Touches: Making it Yours

The final steps are all about adding the personal touches that will make your shed truly your own.

Siding:

Choose siding that complements your house and landscaping. Vinyl siding is low-maintenance and durable, while wood siding offers a more rustic look. Proper installation is key to prevent damage from weather.

Painting or Staining:

Protect your shed from the elements and add a personal touch with a coat of paint or stain. Choose exterior-grade products designed to withstand UV rays and moisture.

Interior Finishing:

This is where you can get creative! Install shelving, workbenches, or whatever else suits your needs. Consider adding lighting and electrical outlets if you plan on using power tools.

Commonly Asked Questions

Here are some common questions I get asked about shed building:

  • How long does it take to build a shed? The time it takes to build a shed depends on the size and complexity of the project, as well as your experience level. A small shed could be built in a weekend, while a larger, more complex shed might take several weeks.
  • How much does it cost to build a shed? The cost of building a shed varies greatly depending on the size, materials used, and your level of DIY skill. Expect to spend anywhere from a few hundred dollars to several thousand.
  • Do I need any special tools? Basic carpentry tools are essential, including a hammer, saw, measuring tape, level, and screwdriver. Power tools can speed up the process, but aren’t strictly necessary.
  • Can I build a shed by myself? While it's possible to build a shed solo, it's often easier and safer to have a helper, especially for tasks like lifting heavy materials.
  • What if I make a mistake? Don't worry! Everyone makes mistakes. Careful planning and attention to detail will minimize errors, but if you do make a mistake, don't panic. There are usually ways to fix it, or you can always ask for advice from experienced builders.
  • How do I protect my shed from the elements? Using high-quality, weather-resistant materials is crucial. Proper sealing and painting or staining will provide added protection. Consider adding gutters and downspouts to redirect water away from the shed's foundation.

Building a shed can be a challenging but rewarding experience. Remember to plan carefully, take your time, and enjoy the process. Good luck, and happy building!

Continue reading

DIY small shed for tools and storage

Building Your Own Tiny Tool Shed: A DIY Adventure

So, you're thinking about building a small shed? Awesome! It's a super rewarding project, and the sense of accomplishment when you're finally using your own hand-built storage space is unbeatable. I'm going to walk you through the whole process, from planning to the final nail (or screw, depending on your preference!). Don't worry if you're not a seasoned carpenter â€" this is totally doable for a DIY enthusiast with some basic skills and a whole lot of enthusiasm.

Phase 1: The Planning Stage (Crucial, I promise!)

Before you even think about touching a tool, you need a solid plan. This isn't just about slapping some wood together; a little forethought saves a lot of headaches (and potentially, money!).

Size and Location

First things first: how big do you need your shed to be? Be realistic. Measure your tools and materials, and add a bit of extra space for future acquisitions. Remember to factor in how much space you'll need to comfortably move around *inside* the shed. A cramped shed is no fun! Next, choose a location that's level, accessible, and meets any local building regulations. Consider sunlight (you might want a bit for natural light), proximity to your house (for easy access), and drainage (you don't want water pooling around your new shed).

Materials and Tools

This is where your shopping list comes in. Pressure-treated lumber is your best bet for the frame, as it'll resist rot and insects. For the siding, you can get creative. Shiplap, plywood, vinyl siding â€" the options are plentiful! Decide on your roofing material too â€" asphalt shingles are popular and relatively inexpensive. Don't forget about things like screws, nails, hinges, a door handle, and any sealant you might need. As for tools, you’ll likely need a measuring tape, saw (circular saw or hand saw), drill, level, hammer or nail gun, screwdriver (or drill with screwdriver bits), and safety glasses (always!).

Budgeting

This is important! Get a rough estimate of the cost of materials and factor in any potential unexpected expenses. Prices fluctuate, so check multiple suppliers for the best deals. Building a shed is cheaper than buying a pre-made one, but it still requires an investment. Plan your budget beforehand to avoid any financial surprises during construction.

Permits and Regulations

Check with your local council or homeowners association to see if you need any permits or if there are any restrictions on shed size or placement. Ignoring this step can lead to serious problems down the line, so it's worth the effort to be informed.

Phase 2: Construction â€" Let's Build!

Now for the fun part! Remember to follow all safety precautions and take breaks when needed. This isn't a race.

Building the Frame

Start with the base. You might want to use concrete blocks or a concrete slab for a sturdy foundation. Then, build the frame using your pressure-treated lumber. Make sure everything is square and level using your level and measuring tape. This is the backbone of your shed, so precision is key.

Adding the Walls and Roof

Once the frame is up, you can attach the siding. This is where you can personalize your shed â€" choose the material and style that best suits your taste. Then, build the roof trusses (or use pre-made ones) and cover them with your chosen roofing material. Remember to ensure proper water runoff to avoid leaks.

Installing the Door and Windows

Cut out the openings for your door and any windows you've decided to include. Install the door using hinges and a handle. Adding windows will brighten up your shed and improve ventilation.

Finishing Touches

Once the main structure is complete, give everything a good clean. Apply any necessary sealant to protect the wood from the elements. Consider painting or staining your shed to add protection and enhance its appearance. You can even add a little trim to make it look even more polished.

Phase 3: Enjoy Your New Shed!

Congratulations! You've built your own shed! Take a moment to admire your handiwork. Organize your tools and materials, and enjoy the satisfaction of having a neat and tidy space for all your belongings. Remember to regularly maintain your shed to ensure it lasts for years to come.

Commonly Asked Questions

Here are some frequently asked questions about building a DIY shed:

Q: How long does it take to build a small shed?

A: This depends on the size and complexity of your shed, as well as your experience level. A simple small shed could take a weekend, while a more complex one could take several weekends or even longer.

Q: How much does it cost to build a small shed?

A: The cost varies greatly depending on materials, size, and features. Expect to spend anywhere from a few hundred to a few thousand dollars.

Q: Do I need any special skills to build a shed?

A: Basic carpentry skills are helpful, but it's not essential to be a professional. There are plenty of resources online and in libraries that can guide you through each step of the process.

Q: What if I make a mistake?

A: Don’t worry, everyone makes mistakes! That's part of the learning process. Take your time, double-check your measurements, and don't be afraid to ask for help if you get stuck. Sometimes a little extra time spent on planning and careful execution can save you from having to fix bigger errors later on.

Q: Can I build a shed without a concrete foundation?

A: You can, but a concrete foundation is recommended for a longer-lasting and more stable shed. Other options include using pressure-treated skids or a gravel base, but these might not be as durable.

Remember, building your own shed is a rewarding experience. Have fun, be patient, and enjoy the process! And if you have any more questions, feel free to ask!

Continue reading

Friday, January 17, 2025

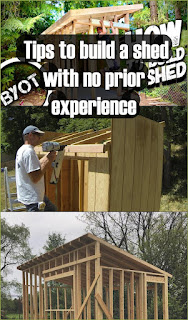
Tips to build a shed with no prior experience

Building Your First Shed: A Beginner's Guide

So, you've decided to tackle the rewarding (and sometimes challenging!) project of building your own shed. That's fantastic! No prior experience? Don't worry, plenty of people have built their first shed with zero experience, and you can too. This guide will walk you through it, step by step, in a way that's easy to understand, even if you've never held a hammer before (well, maybe you have!).

Planning is Key: Before You Even Touch a Tool

Building a shed isn't just about hammering nails; it's about planning. This phase is crucial, especially for first-timers. Skipping it can lead to headaches, wasted materials, and a final product that might not quite meet your needs.

Choosing Your Shed Design

The internet is a treasure trove of shed plans. You can find free plans, or you can buy detailed plans from various sources. Consider what size you need. How much stuff do you need to store? Will you need a workbench? Do you want windows? Think about the overall style â€" a simple gable roof is usually easiest for beginners. Don't go overboard on your first attempt; a simpler design is much less stressful.

Obtaining the Necessary Permits

This is really important. Check with your local council or building authority about any permits required before you even begin digging. You don’t want to build your beautiful shed only to find out it's against regulations and needs to be torn down! It's much easier to get the permissions in advance.

Gathering Your Materials

Accurate measurements are vital! Double and triple check your measurements from your chosen shed plans. Once you have your plan, create a detailed materials list. Don't forget things like screws, nails, paint, and any additional hardware. Buying everything at once often saves money.

Let's Get Building: The Construction Phase

Now for the fun part! Remember, take your time. Accuracy is better than speed. If something seems confusing, don't hesitate to look back at your plans or find tutorials online.

Preparing the Site

Level the ground where your shed will go. You might need to remove sod, add gravel, or use landscaping fabric to prevent weeds. A level base is crucial for a stable shed.

Building the Foundation

This depends on your shed design and local regulations. Some simple sheds can sit on concrete blocks, while others may require a more substantial concrete slab. Consult your building plans for specific instructions. If you're unsure about any part of the foundation work, it’s wise to get some professional help here.

Framing the Walls and Roof

This is where your chosen plan will be your best friend. Follow the instructions precisely. Pre-assemble sections on the ground if possible, it’s much easier than trying to build everything in place. Using a level constantly will ensure everything stays square and plumb. Don't be afraid to ask for help from a friendlier neighbour or a family member â€" an extra set of hands can be incredibly useful!

Adding the Siding and Roofing

Once the frame is complete, it's time to add the siding (the outer covering of the walls). Then, install the roofing material. Again, your plan will guide you on the specific techniques and materials needed.

Finishing Touches

This is where you get to personalize your shed. Add doors, windows, and any other features you've planned. Consider adding shelving or a workbench. Painting or staining the shed will protect the wood and add a nice final touch. Don't forget to clean up all the mess around you!

Troubleshooting and Tips for Success

Building a shed is a learning experience. Here are some common challenges and how to tackle them:

  • Measuring twice, cutting once: This old adage is especially true for shed building. Inaccurate cuts can lead to significant problems down the line.
  • Use the right tools: Invest in good quality tools, even if it means renting them. Cheap tools often break or don't perform well, leading to frustration.
  • Take breaks: Building a shed can be physically demanding. Take breaks to rest and avoid injury.
  • Don't be afraid to ask for help: If you get stuck, don't be afraid to ask for assistance from a friend, family member, or even a more experienced builder.
  • Celebrate your success: Once your shed is complete, take some time to admire your handiwork. You've achieved something amazing!

Commonly Asked Questions

Here are some questions frequently asked by first-time shed builders:

  • Q: How long does it take to build a shed? A: This varies greatly depending on the size and complexity of the shed, as well as your experience level. A simple shed can take a weekend, while a more complex one may take several weeks.
  • Q: How much does it cost to build a shed? A: Costs vary widely based on materials, size, and complexity. Research material prices in your area to get a better estimate.
  • Q: What kind of tools do I need? A: The essential tools include a measuring tape, level, saw (circular saw or hand saw), hammer, drill, screwdriver, and safety glasses. Your specific needs will depend on your shed design.
  • Q: Can I build a shed by myself? A: Yes, but it might be more challenging. Having a helper can make the process significantly easier and safer.
  • Q: What if I make a mistake? A: Don't panic! Mistakes happen. Sometimes you can fix them easily, and sometimes you might need to adjust your plan. Learning from mistakes is part of the process.

Building your first shed is a rewarding experience. With careful planning, attention to detail, and a bit of patience, you can create a valuable addition to your property. Good luck, and happy building!

Continue reading
 

Gable Shed Roof Design Copyright © 2016 | Powered by Blogger